So, S'mores - a requirement for any camping trip. I've never been a fan of marshmallows: they're dusty and chewy and don't really taste like much (yet another food that reminds me of the "dust from inside a bass fiddle.") Sparky had been asking me about candymaking, and after searching online for recipes, I found this recipe at Joy of Baking (an excellent blog I highly recommend,) that I thought might be a good entrée into the world of cooked sugar. Not wanting to be overwhelmed by marshmallows, I halved the recipe and used an 8" square baking dish - which still made 12 hefty marshmallows.
1/2 cup cold water, divided (2 quarter cups)
1 1/2 packets unflavored gelatin, or about 3 3/4 teaspoons
1 cup vanilla sugar* (I upped the vanilla ante, and it worked.)
1/2 cup light corn syrup**
1/8 teaspoon salt
1 teaspoon vanilla extract
Cooking spray
Confectioner's sugar (NOT superfine sugar) to dust the outsides of the 'mallows
First we prepared our 8" square baking dish by spraying it with cooking spray, lining it with a sheet of parchment that we folded to go up each side, spraying the parchment lightly (especially on the sides) and dusting the whole thing with a heavy coating of confectioner's sugar.
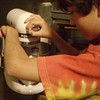 Sparky began by "blooming" the gelatin in the bowl of our stand mixer - meaning, mixing the gelatin powder gently with 1/4 cup of water and the vanilla extract, and then letting it stand for 15 minutes (or about as long as it takes to do the next step)
He then added the remaining water to a saucepan, along with the sugar, corn syrup, and salt. We put the heat on high and (with my help) swirled the pan to help the sugar dissolve and to keep the sides from gathering crystals. We used an instant-read thermometer to measure the temperature, and removed it from the heat when it reached 240 degrees Fahrenheit (I pointed out to Sparky that this was why candymaking could be dangerous: it had barely begun to cook, and was already 28 degrees higher than the boiling point of water. Watch yourself for sugar burns, they're fierce!)
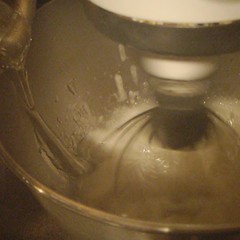 We then began to whip the gelatin with the mixer, just as though it was egg whites. It immediately turned goopy - Sparky and I both sighed, thinking it was a lost cause - but as we began to drizzle the hot sugar syrup in down the side of the bowl, slowly it went from the texture of snot to beautiful creme that instantly had me craving fluffernutters (and I don't even like fluffernutters ;-} .)
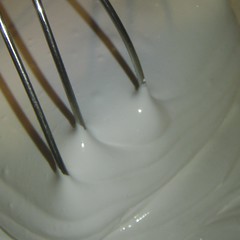 We continued whipping for quite some time until the mass was extremely fluffy and elastic, and showed no signs of deflating when we stopped the whisk. It really is beautiful stuff, but if you think meringue is sticky, this stuff is like industrial cement - so handle with care.
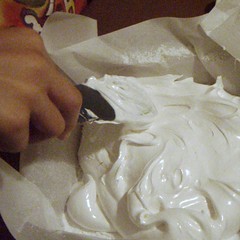
We then blopped, poured, smacked, and smeared (really it was a lot like pro wrestling; ask Sparky) the mixture into our prepared baking pan, sprinkled it with a liberal coating of powdered sugar, and left it on the counter to solidify overnight.
Unfortunately, this was during the Great Chicago Heat Wave of 2011, so the marshmallows were still sticky when we got up in the morning. No worries, we popped the whole thing into the freezer for 10 minutes (probably a good practice anyway) and then began to cut.
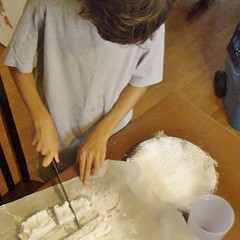 Cutting was also not that simple. We hadn't sufficiently oiled and dusted the sides of our parchment, so the marshmallow had to be scraped off the sides (fortunately, it bounced into shape quite nicely.) Dipping the knife into a big glass of hot water after each cut (I'd recommend drying it in between as well; wet knife=wet marshmallow edges) and Sparky cut the block into lengths, and the lengths into beautiful, fluffy squares that we rolled in even more powdered sugar.
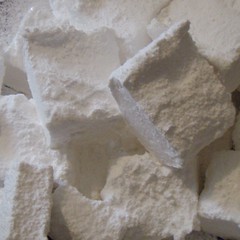
However, learning curve aside - these are sooo totally worth the effort. Chewy, fluffy, and deliciously redolent with vanilla, I'll never go back to store-bought marshmallows again. However, you're going to have to stay tuned for Part II, where these 'mallows REALLY show their stuff - S'mores.
* To make vanilla sugar, purchase a vanilla bean, split it (or split an old one that's dried out, or the shells of one that's been scraped) and bury it in the bottom of a sealed container of sugar. The vanilla will eventually perfume the entire batch. A 2-cup container of sugar will be sufficiently perfumed if you leave it overnight, larger batches may need several days.
**I suppose if you want to tinker, you could use other syrups here: maple, honey, light molasses, Lyle's, sorghum molasses - but all those flavors will compete with vanilla, so we didn't. It must be a syrup and not sugar in water, though - you need the glucose to prevent it from crystallizing.
 We then began to whip the gelatin with the mixer, just as though it was egg whites. It immediately turned goopy - Sparky and I both sighed, thinking it was a lost cause - but as we began to drizzle the hot sugar syrup in down the side of the bowl, slowly it went from the texture of snot to beautiful creme that instantly had me craving fluffernutters (and I don't even like fluffernutters ;-} .)
 We continued whipping for quite some time until the mass was extremely fluffy and elastic, and showed no signs of deflating when we stopped the whisk. It really is beautiful stuff, but if you think meringue is sticky, this stuff is like industrial cement - so handle with care.
We then blopped, poured, smacked, and smeared (really it was a lot like pro wrestling; ask Sparky) the mixture into our prepared baking pan, sprinkled it with a liberal coating of powdered sugar, and left it on the counter to solidify overnight.
Unfortunately, this was during the Great Chicago Heat Wave of 2011, so the marshmallows were still sticky when we got up in the morning. No worries, we popped the whole thing into the freezer for 10 minutes (probably a good practice anyway) and then began to cut.
 Cutting was also not that simple. We hadn't sufficiently oiled and dusted the sides of our parchment, so the marshmallow had to be scraped off the sides (fortunately, it bounced into shape quite nicely.) Dipping the knife into a big glass of hot water after each cut (I'd recommend drying it in between as well; wet knife=wet marshmallow edges) and Sparky cut the block into lengths, and the lengths into beautiful, fluffy squares that we rolled in even more powdered sugar.
However, learning curve aside - these are sooo totally worth the effort. Chewy, fluffy, and deliciously redolent with vanilla, I'll never go back to store-bought marshmallows again. However, you're going to have to stay tuned for Part II, where these 'mallows REALLY show their stuff - S'mores.
* To make vanilla sugar, purchase a vanilla bean, split it (or split an old one that's dried out, or the shells of one that's been scraped) and bury it in the bottom of a sealed container of sugar. The vanilla will eventually perfume the entire batch. A 2-cup container of sugar will be sufficiently perfumed if you leave it overnight, larger batches may need several days.
**I suppose if you want to tinker, you could use other syrups here: maple, honey, light molasses, Lyle's, sorghum molasses - but all those flavors will compete with vanilla, so we didn't. It must be a syrup and not sugar in water, though - you need the glucose to prevent it from crystallizing.



No comments:
Post a Comment